A Comprehensive Cable Ladder Installation Guide
Release time:2026-02-24 Click:10
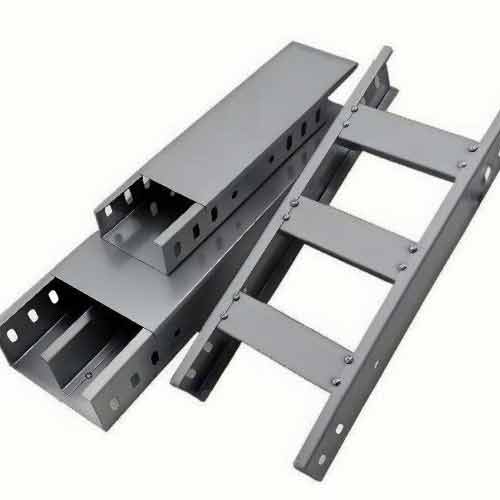
Industrial, commercial, and institutional buildings require organized cable management systems to protect and route electrical, data, and communication cables. Cable ladders are a reliable solution, and following a proper cable ladder installation guide is essential to ensure safety, stability, and long-term performance. This guide outlines the key steps and considerations for successful installation.
The first step in cable ladder installation is planning and preparation. This involves assessing the cable load (weight and number of cables), determining the installation route, and gathering necessary materials—including cable ladders, support brackets, fasteners, and tools. It’s also important to check local electrical codes and safety standards to ensure compliance, as improper installation can pose fire or electrical hazards.
Next, support brackets are installed to secure the cable ladder to walls, ceilings, or structural beams. The spacing of brackets depends on the cable load and ladder length—typically 1.5 to 3 meters apart for standard loads. Brackets must be mounted to sturdy structural elements (not drywall or weak materials) to ensure they can support the ladder and cable weight. They should also be level and aligned to keep the ladder straight.
Once brackets are in place, the cable ladder sections are connected and mounted. Cable ladders are available in pre-cut lengths or can be cut to size, and they are joined using coupling plates and bolts for a secure connection. The ladder must be level and plumb to prevent cable stress or sagging. For corners or changes in direction, specialized elbow or tee fittings are used to maintain a smooth route for cables.
After the ladder is installed, cables are routed and secured. Cables should be placed evenly across the ladder to distribute weight, and they can be secured with cable ties or clips to prevent movement. It’s important to leave space between cables for ventilation, reducing heat buildup that can damage cables. For heavy cables, additional support may be needed to prevent sagging.
The final step is inspection and testing. A thorough inspection checks for loose brackets, unstable connections, or misaligned ladder sections. Cables are inspected to ensure they are not overstretched or damaged. Testing the cable system (for electrical or data cables) ensures proper functionality. Regular maintenance after installation will help maintain the system’s integrity over time.
Previous article:Corrosion Resistant Solid-Bottom Cable Ladder for Harsh Environments
Next article:Superior Corrosion Protection in Cable Management Systems Using Hot Dip Galvanized Cable Ladder Solutions
Hot products
Mobile: +86 15369215227
Email:metalproducts2022@163.com
Email:1626757181@qq.com